MG MS-18E Kampfer

Excepteur sint occaecat cupid- atat non proident, sunt in culpa qui officia deserunt mollit anim id est laborum.

1/35 KV-1 Ehkranami

Excepteur sint occaecat cupid- atat non proident, sunt in culpa qui officia deserunt mollit anim id est laborum.

1/72 A-10 Thunderbolt

Excepteur sint occaecat cupid- atat non proident, sunt in culpa qui officia deserunt mollit anim id est laborum.

1/100 GN-001 Exia

Excepteur sint occaecat cupid- atat non proident, sunt in culpa qui officia deserunt mollit anim id est laborum.

1/35 Panzerspähwagen 8Rad Sd.Kfz.232

Excepteur sint occaecat cupid- atat non proident, sunt in culpa qui officia deserunt mollit anim id est laborum.

UCHG Core Fighter

Excepteur sint occaecat cupid- atat non proident, sunt in culpa qui officia deserunt mollit anim id est laborum.

Bandai NG 1/100 GN-001 Exia


Here's my latest build, its a 1/100 NG Exia. I also used the works of A2 Crafts and Ewac Zone as reference. My goal here is to give the kit some details to be a bit closer to its MG counterpart. Here are some of the WIP photos;


- Addition of panel lines.
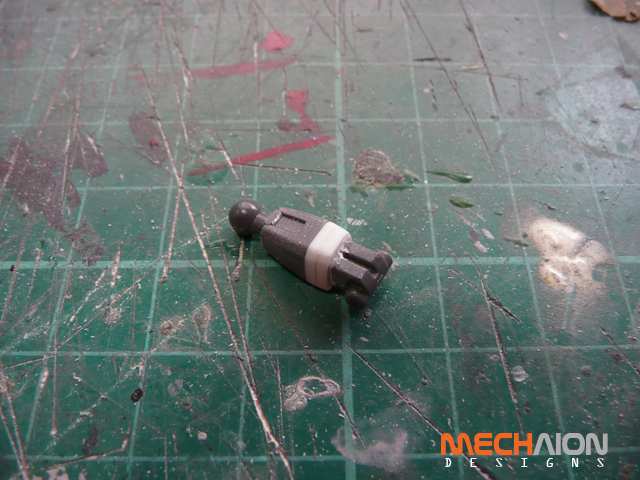

 
-Extended the neck joint by 2mm.
-Lowered the peg connecting the thighs and waist, reinforcing it with a copper wire and plastic sheets.


-Pre-painting modification of the thighs.
-Hollow parts filled with epoxy putty then sanded.
-I also used Wave's O-bolt on the torso for added details.
-Sharpen the weapons.


More photos of the finished kit at -- Mechaion Designs


NG 1/100 Gundam Exia: WIP


It's nice to build my own kits from time to time. But still thinking if Im going to keep or sell this one. :)


Bandai 1/35 UCHG M61A5 Main Battle Tank “Semovente” Phantom Element

Here's the 3rd and final kit of the commission builds I took. Also my first Hard Graph model kit from Bandai. As a fan of armour kits I find this one very impressive specially the perfect fitting and good amount of details. My only gripe is the quality of plastic is far compared with other brands that produce military kits such as Tamiya, Trumpeter and Dragon, which more resistant to enamel thinner or turpentine. 

About the build... primed with Mr Surfacer 1000 and painted with both Gaianotes and Mr Color lacquer paints. Pinwash applied using Tamiya enamels. Filters and Colour variation was done using Artist Oils. Dusting was also achieved using powdered pigments. Honestly I find the whole build a bit clean for my taste. If it was up to me I like to add more weathering (larger chippings, rust and mud) but the client only wants a subtle amount of it. 

With all 3 commission builds done, I can finally proceed and finish my own kit which is already 2 years old in the making due to on & off progress.


More photos at -- Mechaion Designs


Bandai UCHG M61A5 Main Battle Tank “Semovente”: WIP 5

Back for some more and probably last update for this build...


Chippings applied (handbrushed with Dark Gray (Gunze) lacquer paint.


Almost home! Here's what I did;

-Pin wash using Tamiya Dark Brown Enamel
-Used artist oils for filters
-I also used oil paints for colour variation/paint fading.
-Gloss coat applied
-Decals

Will still have to add some pigments for weathering the lower hull and tracks and a final flat coat.


Bandai UCHG M61A5 Main Battle Tank “Semovente”: WIP 4


Pre-shading started by painting the edges and panels black then toning it down with white.


Base coat applied, I used Mr Color Sandy Brown. 


Then highlighted with a mixture of Sandy Brown + Yellow + White.


Here's another view, highlights are much more visible.


Bandai UCHG M61A5 Main Battle Tank “Semovente”: WIP 3


Back to work! The kit was primed using Mr. Surfacer 1000. Preparation for the shading also done, I painted the panels and edges with black lacquer paint. Theory here is when I apply the base coat which is somewhat yellowish the layer hitting the black surface will give the kit a nice shade or shadow.


Since I dont want the contrast of the base paint to be that strong I applied White on the surface just to tone down the black, turning it into gray. This will also make the base coat pop even better and coverage a bit easier.


Same goes with the wheels...

Progress is quite slow due to the cold weather which is giving me a hard time due to condensation and making my AB to spit water.


Bandai UCHG M61A5 Main Battle Tank “Semovente”: WIP 2


Here's the size of the Semovente compared to a KV-1. Its just that massive and Im liking it.    


Bandai even provided some photo etched parts for additional details which I think are great.


PE parts for the "cage". 


I think these PE chains for the smoke grenades are the hardest part of the build for me. They are so small and quite fragile to work with especially if you have big hands. 


Dry fitting stage is complete and ready for priming.


Bandai UCHG M61A5 Main Battle Tank “Semovente”: WIP


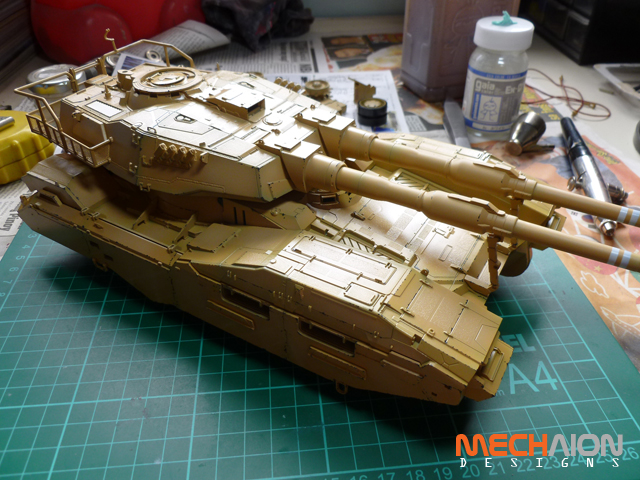
Time to face this beast! This is the 3rd kit of the 3 commissions that was given to me, first was the Exass then the Gunbarrel. Will be out of the box as usual. For the color and finish the client wanted an artic scheme with minimal weathering, but I personally dont like the idea, I want to retail the desert scheme of the tank and put on some heavy weathering. As an armor kit fan, I know tanks like this screams for weathering. So will still persuade him with my idea and hopefully convince him. :)


Still on a dry-fitting stage. Very impressed with Bandai, the construction is just flawless. Unlike other armors like Tamiya and Trumpeter, this one is mostly snapfitted with minimal gluing. Its also well detailed and the size is just massive. Will try to compare it to another armor once I'm done snapping all the parts together. 

That's all for now. :)


Dragon 1/16 Unterscharfuhrer Figure (Modified)


Well, here's my first attempt on figures... Its a 1/16 Unterscharfuhrer figure by Dragon. Love this brand, the details were great and assembly is fairly easy. The only comment I can give is there are some gaps on the arms and legs when assembled but I think its pretty standard for these types of kits and nothing putty cant fix. Like I said in my previous post, the goal here is to make it a cyborg-zombie looking soldier. I used mostly acylic paints as base coat for the uniform, skin and details. Followed by artists oils for blending. Still far from perfect but I really had fun doing this project and for sure this will not be my last figure build.


As usual more photos at -- Mechaion Designs 


Dragon 1/16 Unterscharfuhrer Figure: WIP 2


I applied a black acrylic wash on the figure first to raise the details, so that I can paint it a bit easier by seeing  the borders.


First time to paint skin tone, must admit its a trial and error process. I used acrylics as the base coat and oils for blending/highlights. I was also trying to simulate a zombie-ish looks thats why its sort of pale/grayish looking.


Here's a failed attempt on using acrylics to do the dark and light areas on the uniform. Somehow I cant get the effect that I want so I still resorted to a familiar medium which is oils to do most of the shading.


So far, this is what I got after the highlights and shading plus detail painting.


HG 1/144 RGM-79[G] GM Ground Type


Here's my latest build, actually a fun build. Also my contribution to Pla-zone's "Back to Basics" GB and will be donated/lend to Mechapinoy's kit pool project. This one is an old HG GM sniper which I poorly built & painted way back when I was new to the hobby. I decided to restore it since I dont want to see it just inside a box with other scraps and collecting dust. At the same time help the 2 communities with their respective projects. So about the build, as usual OOTB,  AB'ed with Gaianotes laquer paints (change the color scheme too), weathering was achieved using artist's oils and Tamiya weathering master (dusting on the feet & lower legs). 


More photos at the main gallery -- Mechaion Designs


Dragon 1/16 Unterscharfuhrer Figure: WIP


Here's a small update on my first 1/16 figure build. So far I've sculpted the gas mask and some armour /guards, I used Tamiya Epoxy Putty by the way. For the details on the mask I ended up using different Kotobukiya MSG's. Good thing is I still have some spares which I think fit the scale. I also replaced the right hand with a manipulator (from my HGUC Asshimar). For the flooring, I used a 1.5mm plastic sheet, cut and scribed. Got the idea from Julius of Pla-Zone.