1/35 Raiden Armor WIP: Figure Painting
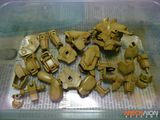
I started painting the figure which will be sandwiched inside the main body of the kit. The figure was hand brushed using Gunze Lacquer Paints and washed with Tamiya Enamels. The photo above shows the finished figure also applied with flat coat. You may also notice that I did not bother to remove the mold lines on the arms and legs & I only painted the upper half. This is because the figure will only be partially seen when the whole kit is done.
Here are some photos of the painting process...
1. unpainted figure, 2. dark tones applied, 3. light tones applied, 4. details ang highlights, 5. enamel wash
I also painted the interior of the cockpit,hatch and joints with midnight blue. Flat coat was also applied.
Main body assembled with pilot inside.
Academy 1/72 A-10A Thunderbolt: Gloss, Decals and Filter

Final update on my A10 Thunderbolt build, so far I've managed to apply a gloss coat and decals on the model. I also apply a filter on selected panels just to break the monotonous gray color as advised by my friend Wingnut of Plamo and IPMS Philippines (also a great aircraft modeler). Will just wait for it to dry, then the final flat coat will be applied and maybe take some decent photos of the kit.
1/35 Raiden Armor WIP
Kit Description (from HLJ)
Originally released in 1998, this reissued snap-fit assembly kit of Raiden Armor from "Gasaraki" comes molded in color and will be fully articulated with polycap joints upon completion. Its canopy and cockpit hatches can open, and Raiden Armor can also be posed in a "seated" configuration for pilot boarding. Two in-scale, unpainted Yushiro Gowa figures (standing and sitting) are included, along with a sheet of stickers for adding details to your completed kit.
While waiting for my A10 Thunderbolt's paint job to cure, I decided to start assembling this kit. This build is for the "Weathering VS Metallic Group Build" of Zero G . Im part of the weathering team by the way. The kit has a fair amount of details, so no problem doing it OOTB which suits my personal preference. For the color scheme Im planning to do a desert scheme, maybe try to simulate the German Afrika Korps scheme since I think I still have some spare German decals which is perfect for this project.
Here are some pics of the snapped kit.
Omni Mecha: Crossover!

Mechapinoy would like to announce it’s first In-House Contest for 2011 -Omni Mecha: Crossover!
CONTEST OBJECTIVE:
To be creative in conceptualizing, modifying, painting and detailing a Mobile Suit that is used by a pilot from another timeline in the whole Gundam series.
For more details, visit: Mechapinoy
Academy 1/72 A-10A Thunderbolt: Painted
Painted the whole kit and weapons. So far I like the results but I also think that the camo edges were too soft compared to the real thing. I also had a hard time fixing the canopy to the fuselage, the parts were seriously misaligned. I had to use a clear epoxy to fix it because of its strong bond. Next will be applying a pin wash and decals. Im still thinking if I should also apply filter. Need to research more on aircraft builds.
Subscribe to:
Comments (Atom)


0 comments:
Post a Comment