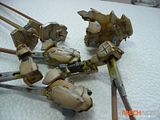
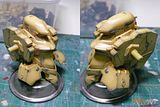
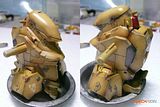
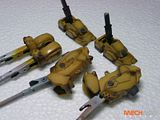
Raiden Armor Done


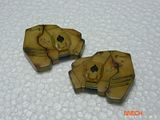
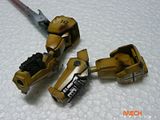
Here’s my contribution to the “Weathering VS Metallic” group build of Zero G. It’s a 1/35th scale Raiden Armor from Bandai. Pretty much an old school kit, lots of seam lines but the details were quite good. I chose this kit mainly because of its scale; I really want and need to practice my weathering since I’m becoming an avid fan or armor kits. About the build, it was purely OOTB except for the additional rifle/weapon. Painted with a mixture of dark yellow and tan (Gunze Lacquer Paints). Same mix with my previous Panzerspahwagen build. For the highlights I just added white to the base color. For the weathering; at first I plan to do it simple and conservative, but I went overboard and decided to make it heavy for a change (not sure if I overdo it). Pin wash, Filter, rust were achieved using oil paints (burnt umber, burnt sienna, black, white and yellow ochre). I also used a Balkenkreuz emblem and some German decals since I’m going with the Afrika Korps scheme.

More photos at Mechaion Designs


0 comments:

Academy 1/72 A-10A Thunderbolt


My first aircraft build and contribution to Mechapinoy's aircraft group build. This was a 1/72nd scale model kit from Academy and also a straight OOTB build. I encountered a couple of problems and fitting issues which was fixed by lots of trimmings and putty work. The hardest part for me was painting the canopy since all the details and edges were inside the canopy, I also kindda messed it up. After gluing it to the fuselage and removing the mask, I saw some dust accumulating and sticking inside the canopy (cannot remove it anymore since I used a clear epoxy as adhesive). At the end, it’s still very enjoyable, for me at least. Since this is another first for me and I've also learned a lot from my mistakes. This also broadens my interest in dealing and building other genres aside from mechas and armors.

More photos at Mechaion Designs.


0 comments:

1/35 Raiden Armor WIP: Weathering Part 2

Photobucket
I think this will be my last update for this build. I applied a second filter (white, still using oil paints thinned with turpentine). This is to tone everything down a bit and simulate watermarks on some areas. After curing this layer I will spray it with the final flat coat, then apply some pigments on the feet and lower legs for mud and dust effects.


0 comments:

1/35 Raiden Armor WIP: Weathering Part 1

Photobucket
Started weathering this kit. My style or preference usually begins with a pinwash using Tamiya Enamel (Dark Brown), this is to raise the details of the kit. This was followed by drybrushing to represent scratches which I stressed on the edges and moving parts I also din some paint chippings using a small piece of sponge. Gunze Lacquer (Dark Gray) was used for both drybrushing and chippings. After drying I sprayed a clear coat of semi gloss, just to protect the paint job and plastic for the next step.

Photobucket
After the semi gloss coat cured, I applied a filter which is a diluted mixture of Burnt Sienna. This is to simulate the discoloration of paintjob. It can also give more depth specially on monotonous subjects. I also placed "rust" on the edges and chipped areas by handbrushing Burnt Sienna + Burnt Umber + Black then blending them slowly until I get the result I wanted. I used oil paints by the way.

Here are the rest of the parts after filtering and rust application;

Photobucket Photobucket Photobucket


0 comments: